One of the most important aspects of a connected device is the ability to update over the air (OTA). This is crucial, as devices may require functionality enhancements, security patches, or bug fixes over time. I had considered implementing an OTA update system from scratch until I discovered Mender—a free and open-source solution that simplifies the management of connected devices without the complexity of maintaining a scalable OTA update server.
Mender consists of two main components: Mender Client and Mender Server. The Mender Client can be installed on Debian- or Ubuntu-based distributions, and for those building custom distributions, Mender provides a Yocto meta-layer. Additionally, Mender offers a hosted server that supports up to 10 devices for free for the first year, making it ideal for testing and evaluation.
In this example, we will use the hosted Mender server. Both the update file generation (Artifact creation) and installation will be performed on the same host to demonstrate the functionality. Currently, updates/artifacts are installed automatically without user intervention. However, the user should have the option to install, retry, or skip an update. This behavior is implemented using a Python script running on the end device. To keep things simple, user preferences will be hardcoded instead of being interactive.
In short, we will update a file on the end device, where the user’s preference determines how the update is handled.
Source
- You can find all the files discussed in this blog from the repository.
Prerequisites
- Account at Hosted Mender
- Ubuntu 20.04 / 22.04 / 24.04 LTS or Debian 11 / 12 Distribution
Mender Client Installation
The Mender Client is a service that runs on the end device and is responsible for managing updates. It offers configurable parameters that affect its functionality. For example, one such parameter is UpdatePollIntervalSeconds, which defines how often the client checks for updates.
Additionally, the Mender Client manages authentication tokens. The JWT token, which is used for authentication, can be accessed through the DBus API. This API allows retrieval of information, such as details about pending artifacts.
-
Express Installation
curl -fLsS https://get.mender.io -o get-mender.sh sudo bash get-mender.sh -
Check for Updates & Upgrade
sudo apt-get update sudo apt-get upgrade -
Setup mender.
sudo mender setup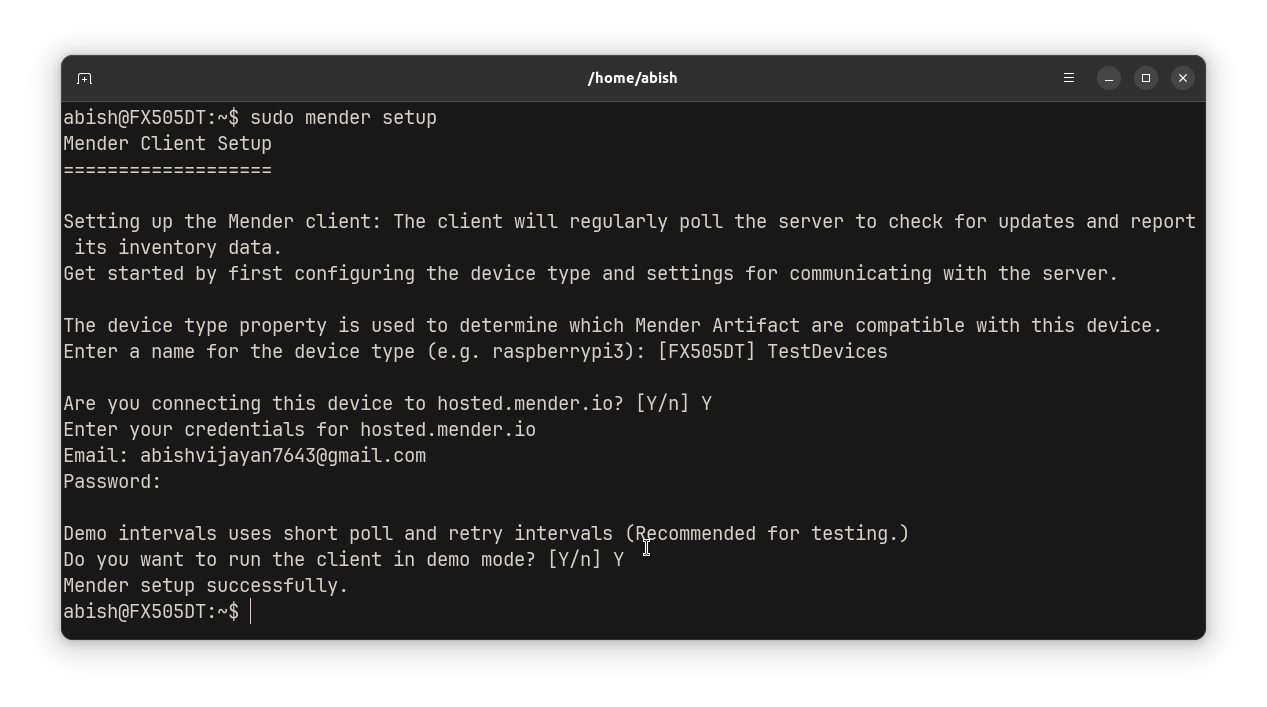
Mender Setup
Configure Mender Client
The Mender Client relies on a global configuration file, mender.conf, located at /etc/mender/mender.conf. To control the frequency of script retries, you can add the parameters StateScriptRetryTimeoutSeconds and StateScriptRetryIntervalSeconds to this file.
Additionally, increasing the Update Poll Interval and Inventory Poll Interval by adjusting UpdatePollIntervalSeconds and InventoryPollIntervalSeconds allows for slower polling, reducing network usage and system load.
sudo nano /etc/mender/mender.conf
{
    ...
    "UpdatePollIntervalSeconds": 300,
    "InventoryPollIntervalSeconds": 300,
    "RetryPollIntervalSeconds": 30,
    "StateScriptRetryTimeoutSeconds": 604800,
    "StateScriptRetryIntervalSeconds": 300,
    ...
}
Install Mosquito Broker
sudo apt install mosquitto mosquitto-clients
Update Download Control (Device)
In Mender, one of the most important concepts is States. The Mender client iterates through each state based on the progress of the update. Before and after the execution of each state, you can implement custom state scripts to suit your needs.
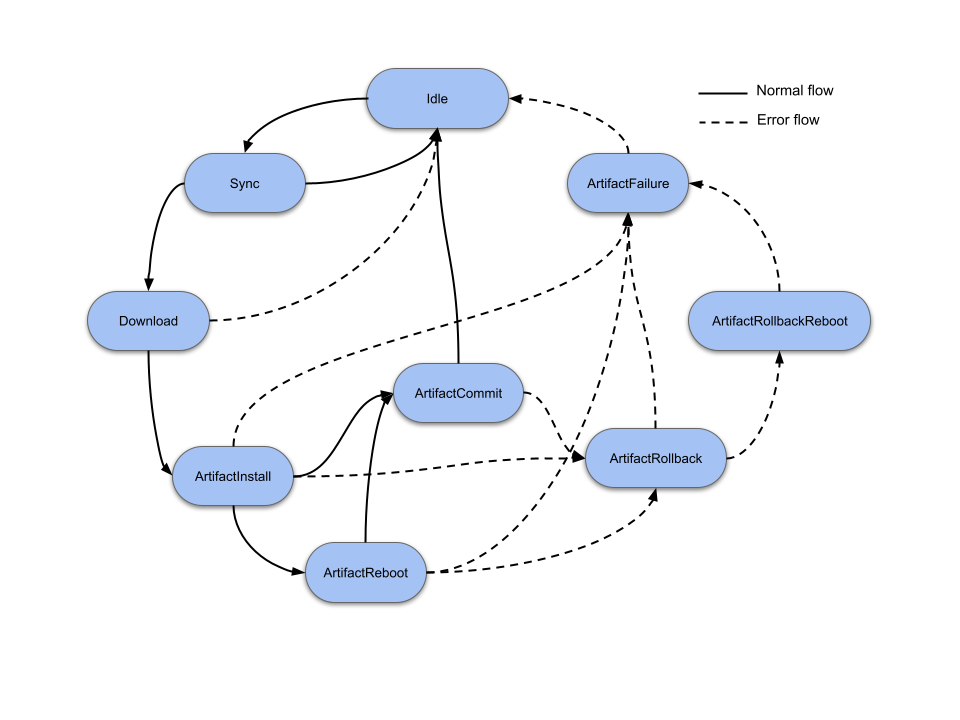
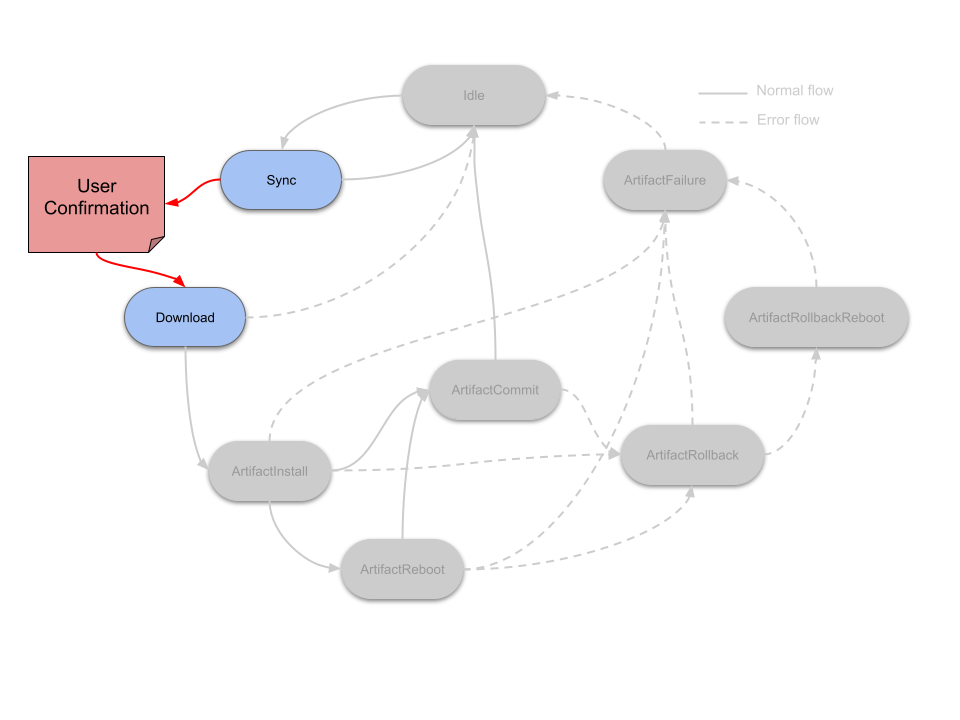
-
Create
Download_Enter_00script.Entermeans that the script should be run before entering theDownloadstate.00is the ordering of scripts. Multiple scripts can be run before entering theDownloadstate.
sudo nano /etc/mender/scripts/Download_Enter_00#!/bin/bash MQTT_BROKER="localhost" MQTT_PORT="1883" MQTT_TOPIC_SUB="mender/update/response" MQTT_TOPIC_PUB="mender/update/enter" mqtt_wait_for_response() { mosquitto_pub -h $MQTT_BROKER -p $MQTT_PORT -t $MQTT_TOPIC_PUB -m "download" RESPONSE=$(mosquitto_sub -h $MQTT_BROKER -p $MQTT_PORT -t $MQTT_TOPIC_SUB -C 1 -W 60) if [[ "$RESPONSE" == '0' ]]; then echo "[Update] Response -> $RESPONSE" return 0 elif [[ "$RESPONSE" == '21' ]]; then echo "[Update] Retry Response" return 21 else echo "[Update] Invalid / No Response" return 1 fi } mqtt_wait_for_response response=$? if [[ $response -eq 0 ]]; then echo "[Update] Proceed" exit 0 elif [[ $response -eq 21 ]]; then echo "[Update] Retry Later" exit 21 else echo "[Update] Drop" exit 1 fiNote: Timeout of 60 seconds is added in
mosquitto_subcommand. Should not increase more thanStateScriptRetryTimeoutSecondsinterval. After timeout, the update will be dropped. -
Make Script Executable
sudo chmod +x /etc/mender/scripts/Download_Enter_00 -
Create the Final Desitination Folder. This will be the folder where the artifact / updated file will be installed.
mkdir -p /home/$USER/MenderApp
Generate Artifact (Update File)
-
Install mender-artifact to generate updates.
sudo apt install mender-artifact -
Create a Project Folder for Generating Artifact
mkdir -p Project/App & cd Project -
Add an example file called metadata.txt
nano App/metadata.txtVERSION=V1.0.3 -
Install Single File Artifact Generator Script.
curl -O https://raw.githubusercontent.com/mendersoftware/mender/4.0.5/support/modules-artifact-gen/single-file-artifact-gen chmod +x single-file-artifact-gen -
Generate Single File Artifact.
./single-file-artifact-gen --device-type TestDevices -o Metadata_V1.0.3.mender -n Metadata_V1.0.3 --software-name Metadata_V1.0.3 --software-version 1.0.3 --dest-dir /home/abish/MenderApp App/metadata.txt
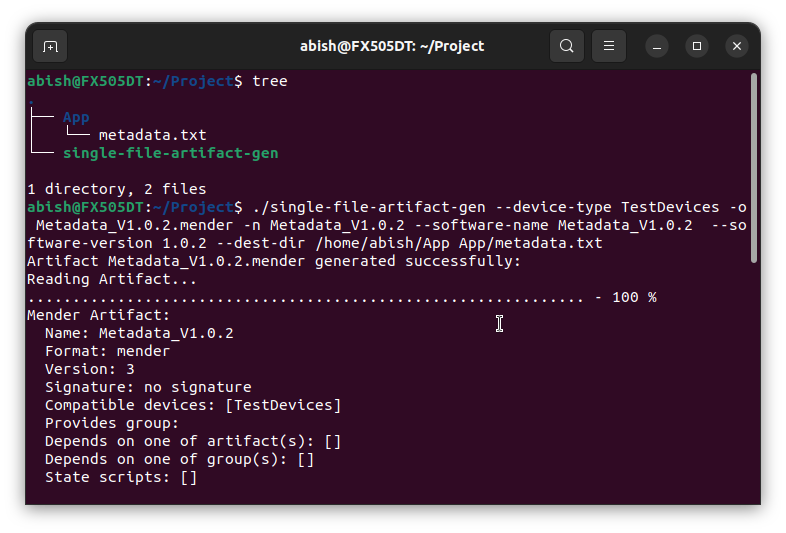
Run Python Script for Controlling Update (Device)
-
Install Dependencies
mkdir -p DownloadControl && cd DownloadControl python3 -m venv venv source venv/bin/activate pip3 install paho-mqtt==1.6.1 -
Install Python Script.
nano main.pyimport paho.mqtt.client as mqtt import logging from time import sleep BROKER = "localhost" PORT = 1883 TOPIC_SUBSCRIBE = "mender/update/enter" TOPIC_PUBLISH = "mender/update/response" USER_PREFERENCE = "21" # Retry Later # USER_PREFERENCE = "0" # Proceed # USER_PREFERENCE = "1" # Skip Update logging.basicConfig( format="%(asctime)s - %(levelname)s - %(message)s", level=logging.INFO, datefmt="%Y-%m-%d %H:%M:%S" ) def on_connect(mqttclient, userdata, flags, rc): if rc == 0: logging.info(f"Connected to MQTT broker at {BROKER}:{PORT}") mqttclient.subscribe(TOPIC_SUBSCRIBE) else: logging.info(f"Failed to connect, return code {rc}") def on_message(mqttclient, userdata, msg): _status = msg.payload.decode("utf-8") logging.info(f"[DownloadControl] Received Status -> {_status}") sleep(1) if _status == "download": logging.info(f"[DownloadControl] Publishing -> {USER_PREFERENCE}") mqttclient.publish(TOPIC_PUBLISH, str(USER_PREFERENCE)) client = mqtt.Client() client.on_connect = on_connect client.on_message = on_message # Connect to the MQTT broker and start the loop client.connect(BROKER, PORT, 60) client.loop_forever()Uncomment
USER_PREFERENCEaccording to the requirement. -
Run Python Script.
python3 main.py
Deploy Update
-
Upload Release Package
In the releases tab of mender, upload the artifact generated.
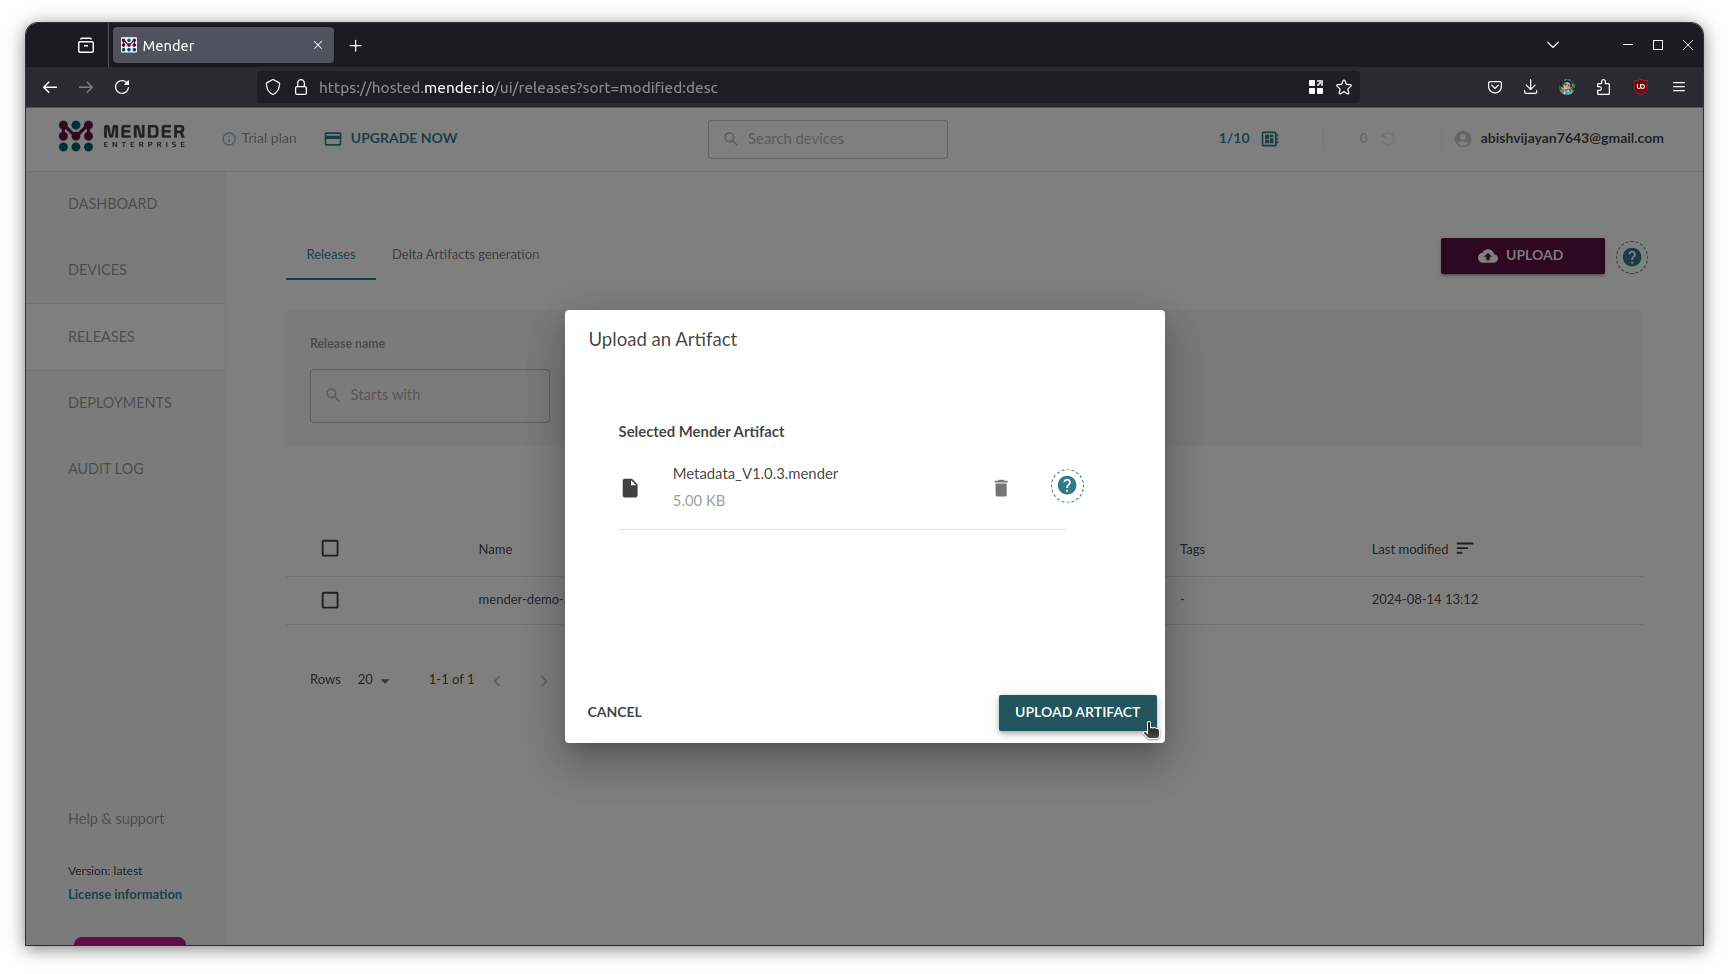
Upload Artifact -
Create Deployment with the uploaded artifact.
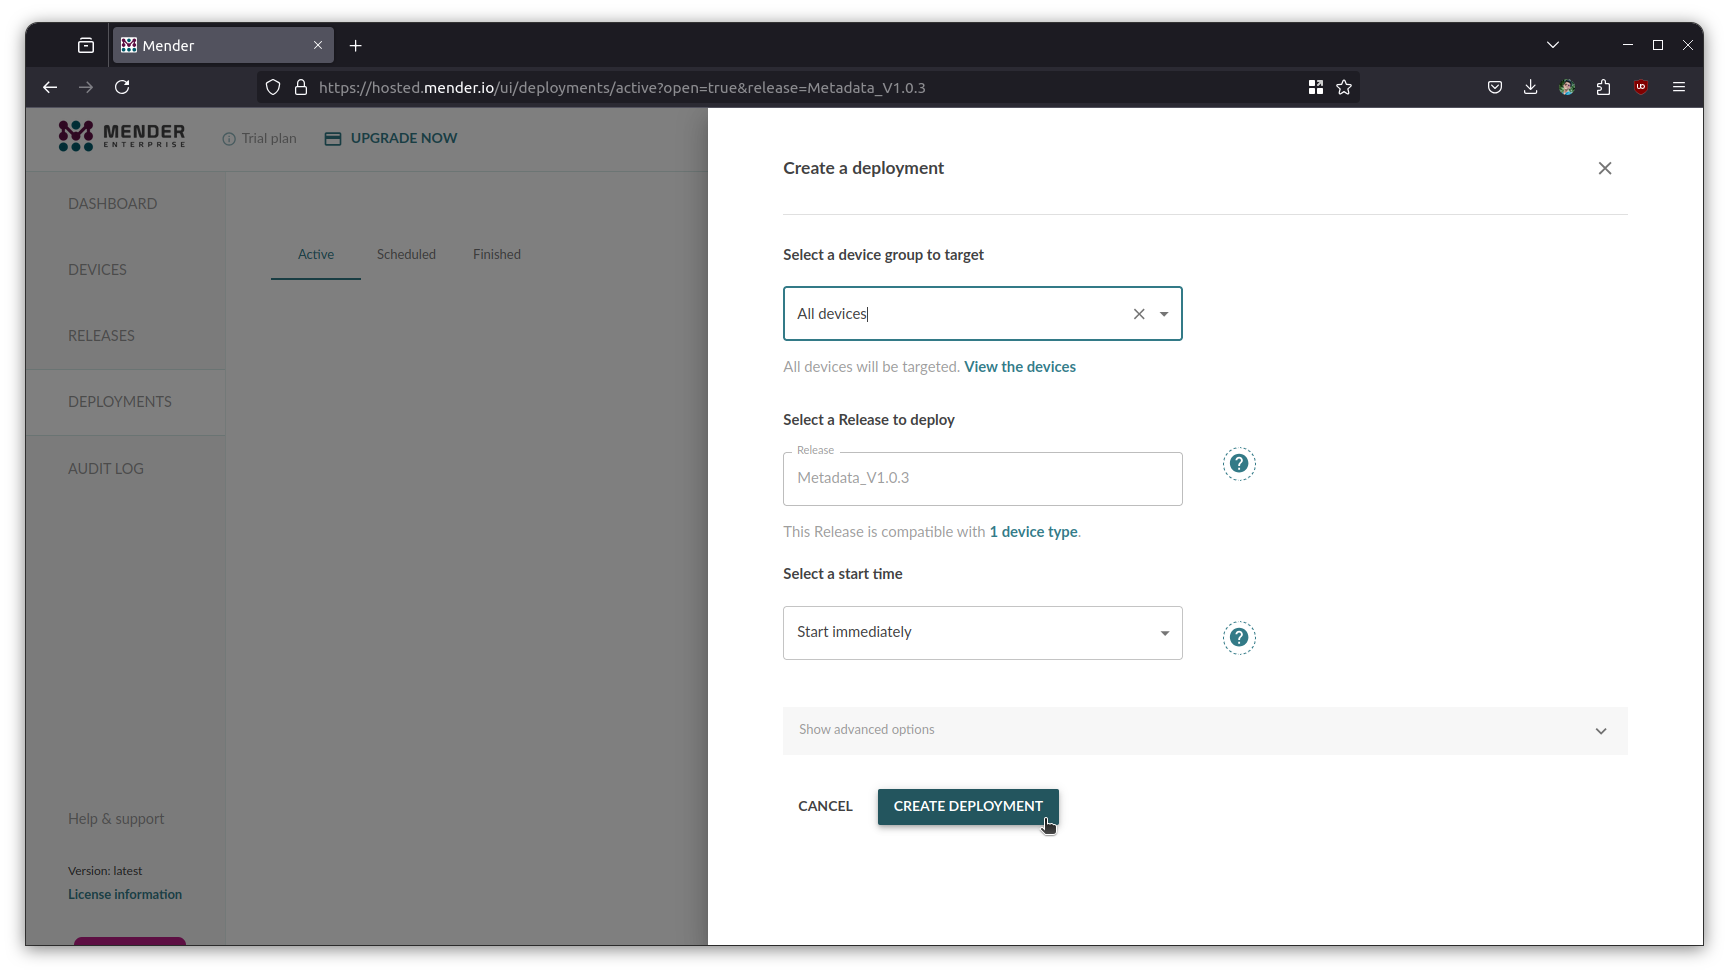
Create Deployment -
Verify Logs & MQTT Control
sudo journalctl -u mender-client.service -f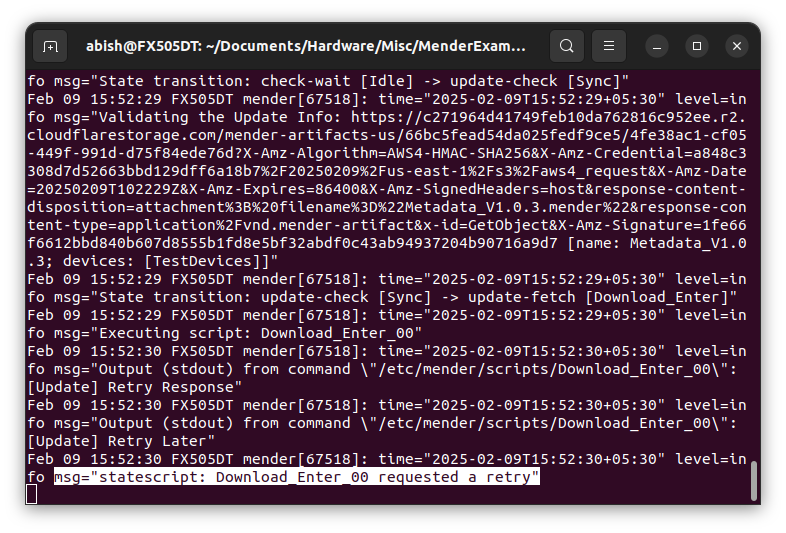
Mender Client Service Log 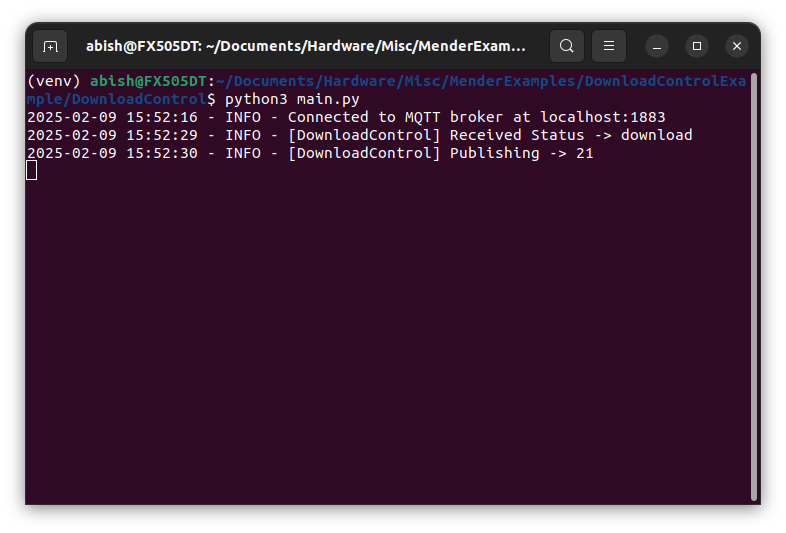
MQTT Control with Python Script Once retry (21) state is returned, after the configured retry interval
StateScriptRetryIntervalSeconds, the device will retry to download. -
Change
USER_PREFERENCEvariable in main.py and re-run the python file to install the Update during the next retry. You can also force retry by restarting the mender-client process.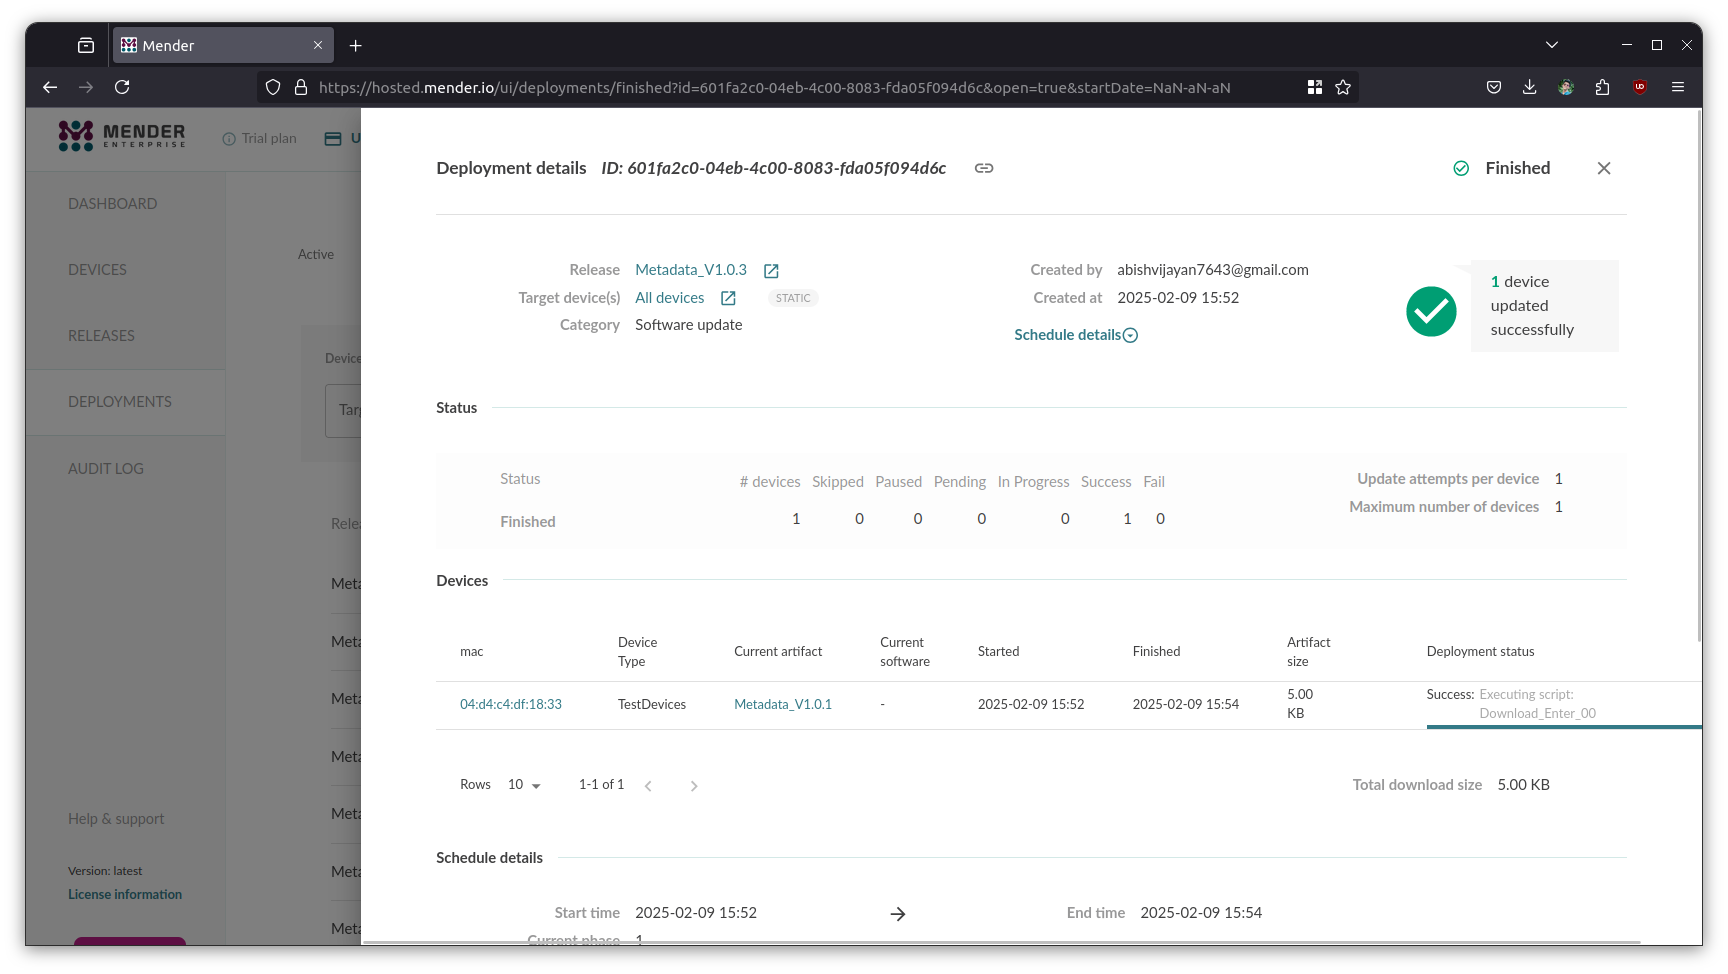
After Installation

